
Recently I’ve been making a number of segmented spheres. For my most recent, I took photos to demonstrate the process of turning a segmented sphere.
Planning
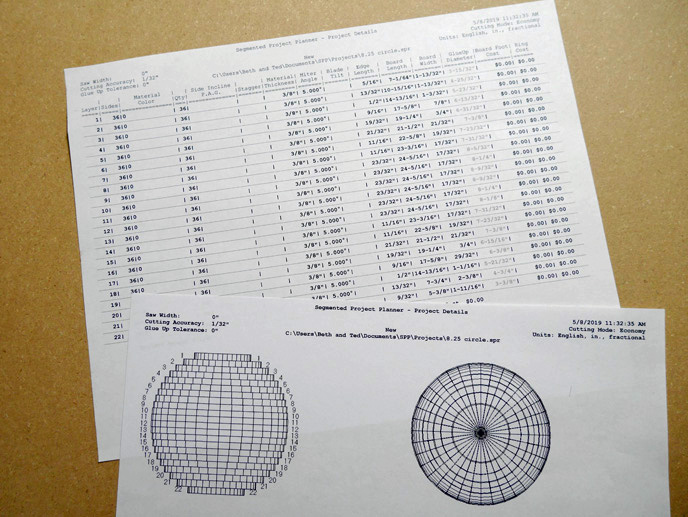
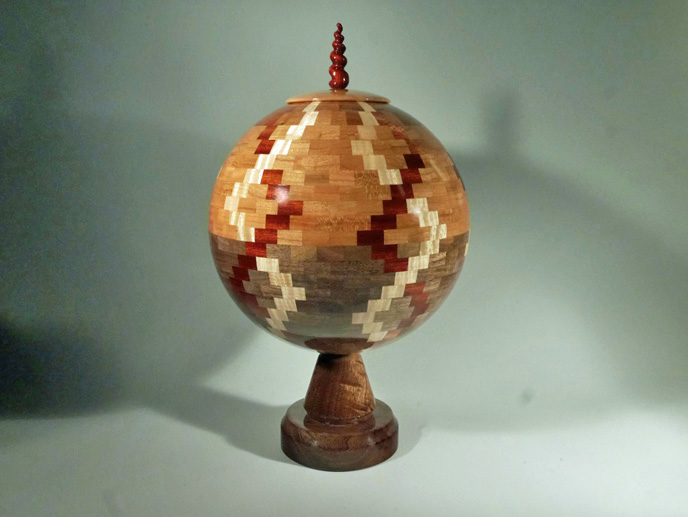
First I decide how large I want the sphere to be — this one is a little over 8 inches in diameter, about the size of a volleyball. I decide how deep I want the rings to be and how many segments I want in each ring.
I use a software application named “Segmented Project Planner” to determine the edge length of the segments in each ring.
Graph paper is useful when I plan out my design. I used figured maple, cherry, walnut, and bloodwood for this sphere.
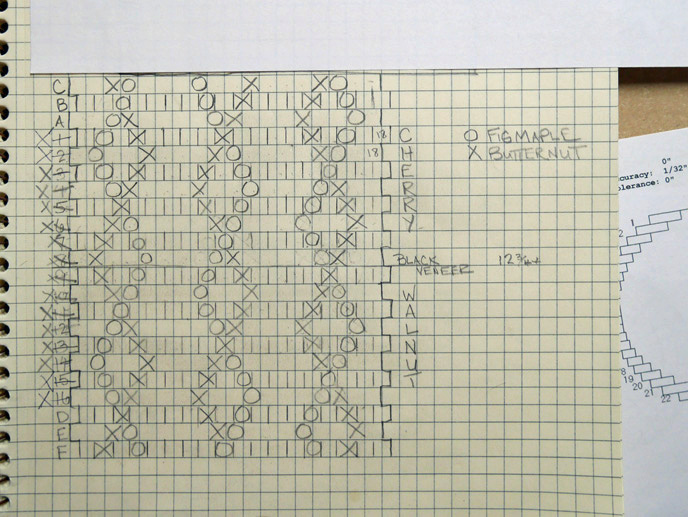
This sphere has 36 segments per ring, and 22 rings, but the pattern in each ring repeats after 18 segments. So for this design, I only used 18 squares of graph paper.
Assembly
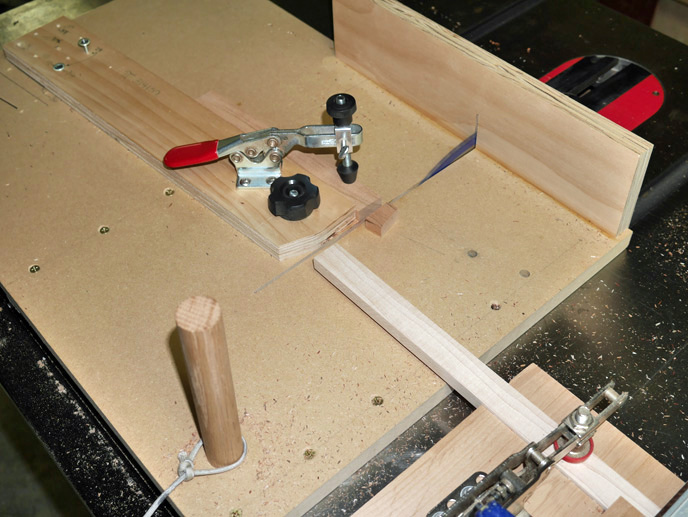
I use my table saw and a shop-made miter jig to cut the segments for the rings.
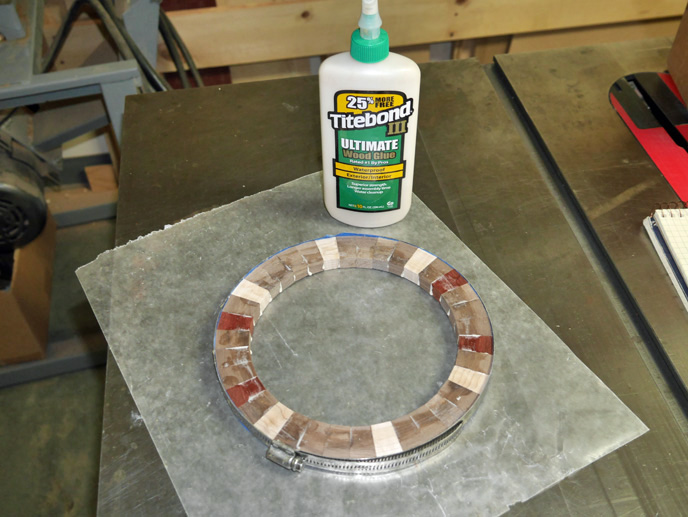
After the segments are cut, I place the segments in the correct order on masking tape to keep them together while I glue them.

I squirt some Titebond III between the segments and use a large hose clamp to keep them snug while they dry.
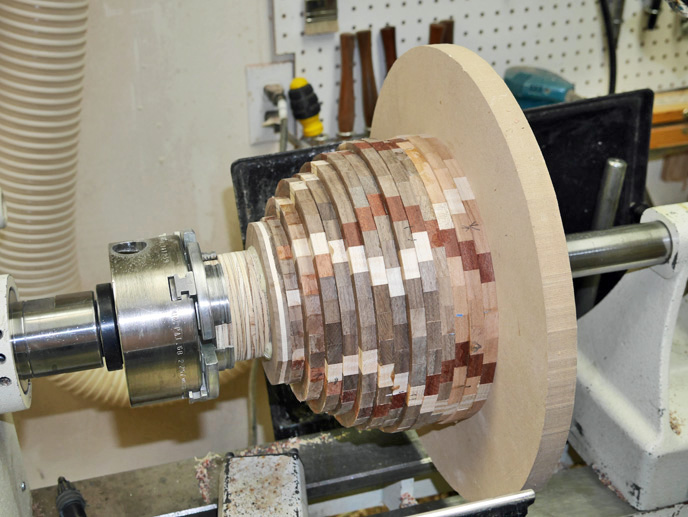
When gluing the rings together, which I do one at a time, I use my tailstock and a flat spacer to keep pressure on the ring being glued.
Turning
Turning a segmented sphere begins before I have all the rings glued in place. I find it easiest to start turning the sphere, especially the inside, before too many rings are glued on and the top access gets too narrow.
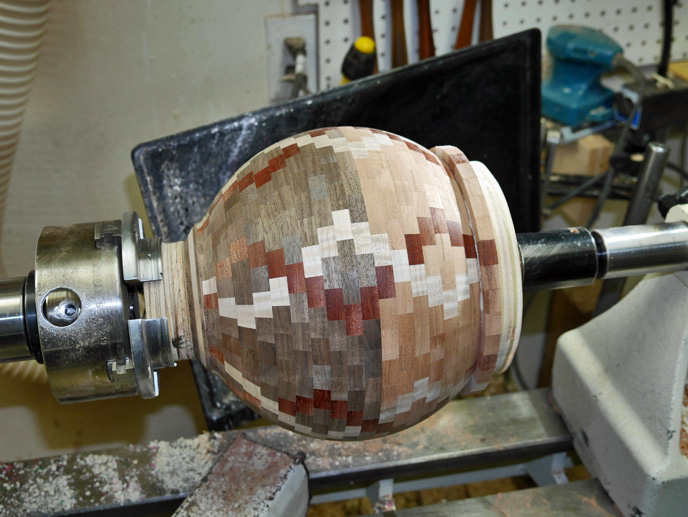
Here I’m sizing the lid.
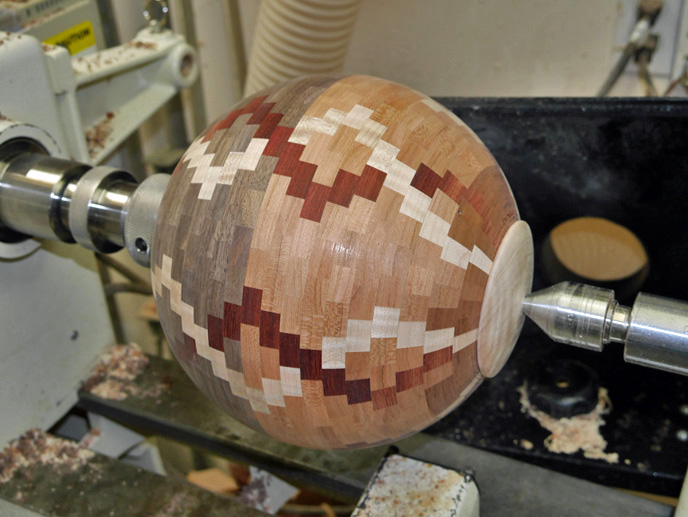
Here I am working on part of the base.

The Result
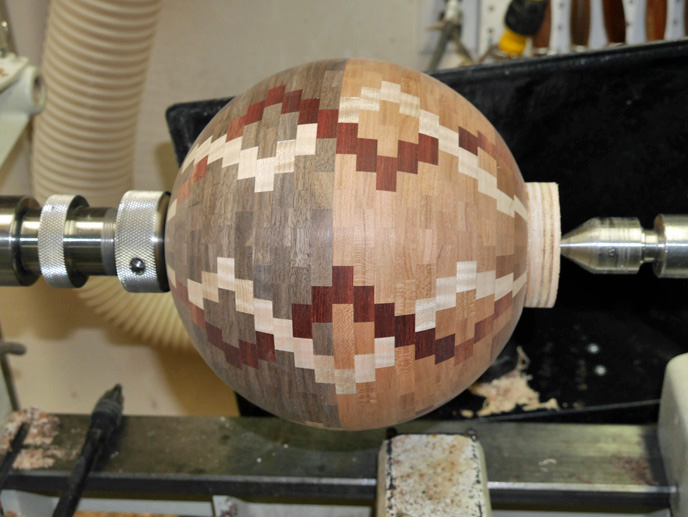
And here’s the final sphere. The pattern reminded me of strings of DNA, so I named it Double Helix.
Another of my segmented spheres named “Balance” is available in our online store here.

It’s just beautiful Ted. I’d get sick dizzy just doing the graphs. Nice photos and explanation.